
Transform Your Manchester Kitchen with Stunning Metro Tile Backsplashes
Discover expert tips for metro tile backsplash installation in Manchester kitchens. Learn about costs, design ideas, maintenance, and professional installation services for stunning results.
The kitchen backsplash serves as both a functional shield against splashes and stains and a stunning focal point that can transform your entire culinary space. Among the countless tile options available to Manchester homeowners, metro tiles have emerged as the undisputed champion of kitchen design, combining timeless elegance with contemporary versatility. These classic rectangular tiles, originally inspired by the subway systems of early 20th-century London and New York, have evolved to become a cornerstone of modern kitchen aesthetics. Whether you're planning a complete kitchen renovation or simply looking to refresh your cooking space, metro tiles offer an unparalleled blend of style, durability, and practicality that makes them the perfect choice for Manchester's diverse architectural landscape.
In this comprehensive guide, we'll explore everything you need to know about metro tile backsplash installation in Manchester kitchens. From understanding the unique characteristics that make metro tiles so appealing to mastering the installation process and selecting the perfect design for your space, we'll cover every aspect of this transformative home improvement project. You'll discover professional installation techniques, cost considerations specific to the Manchester market, design inspiration that complements local architectural styles, and maintenance strategies that will keep your backsplash looking pristine for years to come. Whether you're a seasoned DIY enthusiast or planning to work with professional contractors, this guide will equip you with the knowledge and confidence needed to create a stunning metro tile backsplash that enhances both the beauty and functionality of your Manchester kitchen.
Understanding Metro Tiles: The Foundation of Timeless Kitchen Design
Metro tiles, also known as subway tiles, represent a design philosophy that prioritizes clean lines, geometric precision, and enduring appeal over fleeting trends. These rectangular ceramic tiles, traditionally measuring 75mm x 150mm (3" x 6"), feature a distinctive beveled edge that creates subtle shadows and depth when properly installed. The beveled profile isn't merely decorative; it serves a practical purpose by making minor installation imperfections less noticeable while adding visual interest through the interplay of light and shadow. This forgiving nature makes metro tiles an excellent choice for both professional installations and ambitious DIY projects throughout Manchester homes.
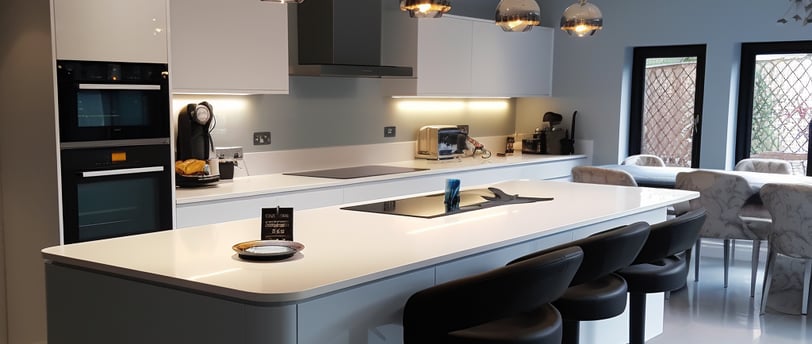
The versatility of metro tiles extends far beyond their classic white glazed finish, though this traditional option remains incredibly popular among Manchester homeowners for its ability to brighten spaces and complement virtually any design scheme. Modern manufacturing techniques have expanded the metro tile palette to include rich blues that echo Manchester's industrial heritage, warm greys that harmonize with contemporary minimalist designs, bold blacks for dramatic contrast, and even textured finishes that add tactile interest. The glazed surface of quality metro tiles provides excellent resistance to moisture, stains, and heat, making them ideally suited for the demanding environment behind cooktops and sinks. This durability, combined with their timeless aesthetic appeal, explains why metro tiles continue to be specified by designers and chosen by homeowners across Manchester's diverse neighborhoods.
The manufacturing quality of metro tiles varies significantly, and understanding these differences is crucial for achieving professional results in your Manchester kitchen. Premium metro tiles feature consistent dimensions, uniform glaze coverage, and precise beveled edges that ensure seamless installation and long-term performance. Lesser quality tiles may exhibit color variations, dimensional inconsistencies, or glaze defects that become glaringly obvious once installed on your backsplash. When selecting metro tiles for your Manchester kitchen renovation, examine samples carefully under different lighting conditions, checking for uniform thickness, consistent beveling, and smooth glaze surfaces. The investment in quality tiles pays dividends in both the installation process and the final appearance of your backsplash.
Design Considerations for Manchester Kitchens
Manchester's rich architectural heritage provides a unique backdrop for metro tile installations, with homes ranging from Victorian terraces to contemporary new builds, each presenting distinct design opportunities and challenges. In traditional Victorian and Edwardian properties common throughout Manchester's established neighborhoods, metro tiles can bridge the gap between period authenticity and modern functionality. The clean lines of metro tiles complement the geometric patterns found in original mosaic floors and decorative moldings, while their neutral palette allows period features to remain the focal point. For these heritage properties, consider classic white metro tiles laid in traditional running bond pattern, which respects the home's historical character while providing modern kitchen functionality.
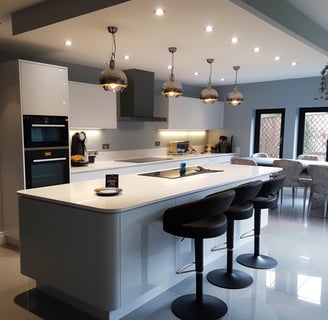
Contemporary Manchester homes and apartments offer greater freedom for bold metro tile applications that can serve as dramatic design statements. Deep navy or charcoal metro tiles create sophisticated backdrops that highlight modern stainless steel appliances and sleek cabinetry, while maintaining the timeless appeal that ensures your kitchen won't look dated in five years. The scale of your kitchen space significantly influences metro tile selection and layout; smaller Manchester kitchens benefit from lighter colors and horizontal installations that create the illusion of width, while larger spaces can accommodate darker colors and more complex patterns without feeling cramped. Consider the natural light exposure in your kitchen, as Manchester's often overcast skies mean that reflective surfaces and lighter colors become even more important for maintaining a bright, welcoming atmosphere.
The growing trend toward open-plan living in Manchester homes requires careful consideration of how your metro tile backsplash will integrate with adjacent spaces. Your backsplash shouldn't exist in isolation but should harmonize with flooring materials, wall colors, and furniture finishes throughout the connected living areas. Neutral metro tiles provide flexibility for changing décor and seasonal updates, while colored tiles make stronger design statements that require more commitment. The height of your metro tile installation also impacts the overall design; extending tiles to the ceiling creates a dramatic, cohesive look that works particularly well in contemporary settings, while stopping at standard backsplash height maintains a more traditional appearance that suits period properties.
Installation Planning and Preparation
Successful metro tile installation begins long before the first tile touches the wall, with thorough planning and meticulous preparation forming the foundation of professional results. Start by carefully measuring your backsplash area, accounting for obstacles like electrical outlets, switches, and any architectural features that will impact tile layout. Create a detailed sketch that includes all measurements and obstacles, as this will prove invaluable when calculating tile quantities and planning cuts. Manchester's older properties often feature walls that aren't perfectly plumb or square, so take measurements at multiple points and note any irregularities that will need accommodation during installation.
The substrate preparation is arguably the most critical aspect of metro tile installation, as even the most beautiful tiles will fail if applied to an inadequate surface. Existing wall surfaces must be clean, dry, level, and structurally sound before tile installation can begin. In Manchester's older properties, this often means addressing issues like loose plaster, uneven surfaces, or previous tile installations that require removal. Drywall surfaces should be primed with an appropriate primer-sealer, while previously painted walls may need light sanding to ensure proper adhesion. Any electrical work, including the installation of new outlets or the relocation of existing ones, must be completed before tiling begins, with proper consideration given to tile layout to minimize cutting around electrical fixtures.
Tool selection and preparation significantly impact both the installation process and the final results of your metro tile backsplash. Essential tools include a high-quality tile cutter or wet saw for precise cuts, various sizes of notched trowels for adhesive application, tile spacers for consistent gaps, a level for ensuring straight lines, and rubber grout floats for finishing. Quality tools produce better results and make the installation process more efficient; attempting to economize on tools often leads to frustration and subpar outcomes. Before beginning installation, ensure you have adequate lighting in your work area, as proper illumination is essential for achieving precise cuts and consistent adhesive application. Organize your workspace to minimize trips for tools and materials, keeping cut tiles organized and easily accessible as you work through the installation.
Step-by-Step Metro Tile Installation Process
The installation of metro tiles follows a systematic approach that builds from careful planning to meticulous execution, with each step contributing to the professional appearance of the finished backsplash. Begin by establishing your starting point, typically at the center of the most visible wall section, working outward to ensure balanced tile placement and symmetrical cut tiles at the edges. Use a level to establish a perfectly horizontal reference line, as this will guide your first row and determine the success of the entire installation. Even slight deviations from level become magnified across a large backsplash area, creating obviously crooked lines that detract from the overall appearance.
Apply tile adhesive using the appropriately sized notched trowel, working in manageable sections that can be tiled before the adhesive begins to skin over. The correct adhesive coverage is crucial for proper tile adhesion and long-term performance; insufficient coverage leads to hollow spots that may crack under stress, while excessive coverage creates messy installations with adhesive squeeze-out that's difficult to clean. Hold the trowel at a consistent 45-degree angle to create uniform ridges in the adhesive, ensuring complete coverage across the tile back when pressed into position. Work systematically across your reference area, maintaining consistent spacing between tiles using appropriate spacers for your chosen grout line width.
The installation of cut tiles requires particular attention to detail, as poorly executed cuts become glaringly obvious in the finished installation. Measure twice and cut once, using a sharp tile cutter or wet saw for clean, precise cuts that fit perfectly against walls, outlets, and other obstacles. Inside corners often require tiles with two cut edges, demanding careful measurement and cutting technique to achieve tight fits without gaps. Outside corners, less common in backsplash installations but occasionally encountered around architectural features, require precise 45-degree miter cuts for professional appearance. Take time to dry-fit cut tiles before applying adhesive, ensuring proper fit and making any necessary adjustments before permanent installation.
Grouting and Finishing Techniques
The grouting process transforms individual tiles into a cohesive, finished surface while providing crucial protection against moisture infiltration and maintaining the structural integrity of your metro tile installation. Grout selection significantly impacts both the appearance and performance of your backsplash; unsanded grout works best for metro tiles with their typically narrow grout lines, while grout color can either complement the tiles for a subtle, unified appearance or contrast dramatically for bold definition between tiles. Light grey grout provides a classic appearance with white metro tiles, offering enough contrast to define individual tiles without overwhelming the overall design, while darker grouts create more dramatic definitions that emphasize the geometric pattern.
Proper grout mixing and application techniques are essential for achieving professional results that will maintain their appearance over time. Mix grout to a smooth, consistent texture without lumps, following manufacturer's instructions precisely for water ratios and mixing procedures. Apply grout using a rubber float held at a 45-degree angle, working diagonally across tiles to completely fill joints without leaving voids or air pockets. Remove excess grout promptly using a clean, damp sponge, working carefully to avoid disturbing the grout lines while cleaning tile surfaces thoroughly. The timing of grout cleanup is critical; waiting too long makes removal difficult and may require aggressive cleaning that damages grout lines, while cleaning too early can pull grout from joints.
The final finishing touches elevate your metro tile installation from good to exceptional, with attention to details that mark the difference between amateur and professional work. Caulk all perimeter joints where tiles meet walls, countertops, or cabinets, using high-quality silicone caulk that matches or complements your grout color. Proper caulking prevents water infiltration while accommodating normal building movement that could crack rigid grout in these expansion joints. Clean all tile surfaces thoroughly after grout has fully cured, removing any grout haze or adhesive residue that could dull the finished appearance. Consider applying a grout sealer after complete curing to enhance stain resistance and simplify future maintenance, particularly important in kitchen environments where grease and food spills are inevitable.
Cost Analysis for Manchester Metro Tile Projects
Understanding the financial investment required for metro tile backsplash installation in Manchester helps homeowners make informed decisions about materials, labor, and project scope. Material costs typically represent 30-40% of the total project budget, with metro tiles ranging from £15-25 per square meter for basic ceramic options to £40-80 per square meter for premium handmade or specialty finishes. Additional materials including adhesive, grout, trim pieces, and finishing materials add approximately £10-15 per square meter to material costs. When calculating tile quantities, purchase 10-15% extra tiles to account for cutting waste and future repairs, particularly important for specialty or discontinued patterns that may not be available later.
Professional installation costs in Manchester vary based on project complexity, installer experience, and current market demand, typically ranging from £80-150 per square meter for standard installations. Complex layouts, extensive cutting around obstacles, or challenging site conditions can increase labor costs significantly. Many Manchester contractors offer package pricing that includes both materials and installation, often providing better value than purchasing materials separately. When comparing quotes, ensure all estimates include the same scope of work, including surface preparation, material disposal, and cleanup, as these items can add substantial costs if not included in the original estimate.
The value proposition of metro tile backsplashes extends beyond initial installation costs to include long-term durability, ease of maintenance, and potential impact on property values. Quality metro tile installations can last 20-30 years with proper maintenance, making them an excellent long-term investment compared to alternative backsplash materials that may require more frequent replacement. The timeless appeal of metro tiles also provides protection against design obsolescence, ensuring your kitchen remains stylish and marketable throughout changing trends. For Manchester homeowners considering property resale, professional metro tile backsplashes consistently appeal to buyers and contribute positively to perceived kitchen quality and overall home value.
Popular Metro Tile Patterns and Layouts
The versatility of metro tiles extends far beyond the traditional running bond pattern, with numerous layout options available to create unique design statements that complement Manchester's diverse architectural styles. The classic running bond pattern, where each tile overlaps the joint of the tiles below by half their length, remains the most popular choice for its timeless appeal and ease of installation. This pattern works particularly well in traditional Manchester homes, where it provides a clean, understated backdrop that allows other design elements to take center stage. The horizontal emphasis of running bond can make kitchens appear wider, particularly beneficial in the narrower kitchen layouts common in Manchester's terraced housing.
Herringbone patterns create dramatic visual interest by arranging metro tiles in a zigzag pattern that draws the eye and adds sophisticated texture to kitchen backsplashes. This pattern requires more complex cutting and planning but produces stunning results that elevate the perceived quality of kitchen design. Herringbone works particularly well behind cooktops as a feature area, creating a focal point that commands attention without overwhelming the space. The diagonal lines of herringbone patterns can help break up the strong horizontal and vertical lines common in kitchen design, adding dynamic visual movement that keeps the space interesting.
Vertical stack patterns, where tiles are arranged in straight vertical columns, create a contemporary appearance that emphasizes height and adds drama to kitchen spaces. This pattern works exceptionally well in Manchester's higher-ceiling Victorian properties, where it can help highlight the generous proportions of period kitchens. Vertical installations can make standard-height ceilings appear taller, an advantage in many contemporary Manchester apartments and conversions. The clean, geometric lines of vertical stack patterns complement modern minimalist design philosophies while maintaining the classic appeal of metro tiles. Consider combining patterns within a single installation, using herringbone or vertical patterns as feature areas within predominantly running bond installations for added visual interest without overwhelming the space.
Maintenance and Longevity
Proper maintenance ensures your metro tile backsplash maintains its beauty and functionality for decades, protecting your investment while preserving the stunning appearance that makes metro tiles so appealing. Daily maintenance involves simple wiping with a damp cloth to remove cooking splashes and prevent the buildup of grease and food residues that can dull tile surfaces over time. The glazed surface of quality metro tiles resists staining and moisture absorption, making routine cleaning straightforward with standard household cleaners. Avoid abrasive cleaners or scrubbing pads that could scratch the glaze surface, instead using gentle dish soap solutions or specialized tile cleaners for more thorough cleaning.
Grout maintenance requires more attention than the tiles themselves, as grout lines are more porous and susceptible to staining and discoloration. Weekly cleaning with a grout brush and mild cleaning solution helps prevent the buildup of grime and maintains the crisp appearance of grout lines. For stubborn stains, baking soda paste provides gentle abrasive action without damaging grout surfaces. Professional grout cleaning services, available throughout Manchester, can restore severely stained or discolored grout lines to like-new appearance, often proving more cost-effective than grout replacement. Consider annual professional cleaning for heavily used kitchen backsplashes to maintain optimal appearance and hygiene.
Preventive maintenance measures significantly extend the life and appearance of metro tile installations while minimizing the need for repairs or restoration. Promptly address any loose tiles or damaged grout lines to prevent water infiltration that could compromise the installation integrity. Monitor caulk lines around perimeter edges, replacing deteriorated caulk annually to maintain watertight seals. The modular nature of metro tile installations allows for easy replacement of individual damaged tiles without affecting the surrounding installation, making it important to retain extra tiles from the original installation for future repairs. Proper ventilation during cooking helps minimize moisture exposure and reduces the cleaning requirements for your backsplash, while also protecting other kitchen surfaces and finishes.
Professional Installation vs DIY Considerations
The decision between professional installation and DIY metro tile installation depends on multiple factors including skill level, available time, tool access, and the complexity of your specific project. DIY installation can provide significant cost savings, typically reducing total project costs by 40-60% compared to professional installation. However, successful DIY installation requires confidence with tools, attention to detail, and realistic assessment of your abilities to achieve professional-quality results. Simple backsplash installations with minimal cutting and obstacles are well-suited to experienced DIY enthusiasts, while complex layouts or challenging site conditions often benefit from professional expertise.
Professional installers bring experience, specialized tools, and warranty protection that can justify the additional cost for many Manchester homeowners. Experienced professionals can complete installations more quickly and efficiently than DIY efforts, minimizing kitchen disruption during the renovation process. Professional installers also carry insurance protection against damage or defects, providing peace of mind that DIY installations cannot match. When selecting professional installers in Manchester, prioritize contractors with specific tile installation experience, verified references, and appropriate insurance coverage. Quality professional installation often includes warranties on both labor and materials, protecting your investment against defects or premature failure.
The complexity of your specific installation significantly influences the DIY vs professional decision. Simple rectangular backsplashes with minimal electrical outlets and standard layouts are excellent DIY projects for motivated homeowners with basic tool skills. However, installations involving extensive cutting around windows, complex electrical configurations, or challenging site conditions often exceed typical DIY capabilities. Consider the cost of tool purchases or rentals when evaluating DIY options, as quality tools represent significant investment that may approach the cost of professional installation for one-time use. Many Manchester homeowners find a hybrid approach works well, completing surface preparation and material selection themselves while hiring professionals for the actual tile installation and finishing work.
Choosing the Right Professional Installation Services
Selecting the right installation professional ensures your metro tile backsplash project achieves the results you envision while protecting your investment through quality workmanship and appropriate warranties. Start by researching Manchester kitchen renovation specialists who demonstrate specific experience with tile installations and can provide references from recent similar projects. Quality contractors welcome the opportunity to showcase their work and connect you with satisfied customers who can speak to their experience, professionalism, and results. Avoid contractors who cannot or will not provide references, as this often indicates either limited experience or unsatisfied customers.
Licensing, insurance, and professional credentials provide important protection for homeowners while indicating serious commitment to professional standards. Verify that potential contractors carry appropriate general liability insurance and workers' compensation coverage, protecting you from liability in case of accidents or property damage during the installation process. Professional associations and certifications, while not mandatory for tile installation, often indicate commitment to ongoing education and industry best practices. Request detailed written estimates that specify materials, labor, timeline, and warranty terms, allowing accurate comparison between different contractors and preventing misunderstandings during the project.
Communication skills and professionalism during the initial consultation process often predict the overall experience you'll have with a contractor throughout your project. Quality contractors listen carefully to your vision, ask relevant questions about your preferences and lifestyle, and provide honest assessment of what's achievable within your budget and timeline. They should be able to explain the installation process clearly, discuss potential challenges specific to your project, and offer solutions that balance your desires with practical considerations. Professional Manchester builders who specialize in kitchen renovations often provide the most comprehensive service, coordinating tile installation with other aspects of your kitchen renovation for seamless results and simplified project management.
Environmental and Sustainability Considerations
Modern homeowners increasingly consider environmental impact when selecting materials and contractors for home renovation projects, and metro tile installations offer several opportunities to make sustainable choices. Ceramic metro tiles are made from abundant natural materials including clay, sand, and minerals, making them an environmentally responsible choice compared to synthetic alternatives. Many manufacturers now offer metro tiles made from recycled materials or produced using renewable energy sources, reducing the environmental footprint of your installation. Local sourcing of tiles and installation materials, when possible, reduces transportation-related environmental impact while supporting Manchester's local economy.
The longevity of quality metro tile installations contributes significantly to their environmental sustainability by reducing replacement frequency and associated waste generation. Unlike temporary backsplash solutions that may require replacement every 5-10 years, properly installed metro tiles can last 20-30 years or longer, minimizing long-term environmental impact. The ease of cleaning metro tiles with simple, non-toxic cleaners reduces the need for harsh chemicals that can impact indoor air quality and environmental health. Consider selecting grouts and adhesives with low volatile organic compound (VOC) content to maintain healthy indoor air quality during and after installation.
Waste minimization during installation demonstrates environmental responsibility while often reducing project costs. Careful planning and precise measurement reduce tile waste, while proper disposal of construction debris ensures materials reach appropriate recycling facilities when possible. Many ceramic tiles can be recycled or repurposed, though this requires separation from adhesive and grout materials. Working with contractors who prioritize waste reduction and responsible disposal practices aligns your project with broader environmental sustainability goals while often indicating attention to detail and professional standards in other aspects of their work.
Conclusion
Metro tile backsplashes represent an ideal convergence of timeless design, practical functionality, and enduring value that makes them the perfect choice for Manchester kitchen renovations. Throughout this comprehensive guide, we've explored every aspect of metro tile installation, from understanding the unique characteristics that make these tiles so appealing to mastering the technical details that ensure professional results. The versatility of metro tiles allows them to complement Manchester's diverse architectural heritage while providing the durability and ease of maintenance that modern lifestyles demand. Whether you choose classic white tiles for understated elegance or bold colors for dramatic impact, metro tiles offer the flexibility to create a backsplash that reflects your personal style while enhancing your kitchen's functionality.
The investment in quality metro tile installation pays dividends in both immediate satisfaction and long-term value, providing decades of beauty and performance that justifies the initial expense. By understanding the planning requirements, installation techniques, and maintenance needs outlined in this guide, you're equipped to make informed decisions about materials, contractors, and project scope that will result in a backsplash you'll love for years to come. The timeless appeal of metro tiles ensures your kitchen will remain stylish and current regardless of changing design trends, making this renovation choice both practical and forward-thinking.
Your metro tile backsplash project represents more than just a home improvement; it's an opportunity to transform your kitchen into a space that better serves your family's needs while reflecting your personal aesthetic preferences. Take the time to plan carefully, select quality materials, and work with experienced professionals when needed to ensure results that exceed your expectations and provide lasting satisfaction with your Manchester kitchen renovation investment.
Frequently Asked Questions
1. How much does metro tile installation cost in Manchester? Metro tile installation in Manchester typically costs £45-95 per square meter, including materials and labor. Basic running bond patterns are most affordable at £45-65/sqm, while complex patterns like herringbone cost £65-85/sqm due to increased labor requirements.
2. What size are standard metro tiles? Standard metro tiles measure 75mm x 150mm (3" x 6"), featuring the classic rectangular shape with beveled edges that creates subtle shadows and depth. Some manufacturers offer variations, but this remains the most popular size for kitchen backsplashes.
3. Can I install metro tiles myself or should I hire a professional? DIY installation is possible for experienced homeowners with proper tools and skills, potentially saving 40-60% on labor costs. However, professional installation ensures warranty protection, faster completion, and superior results, especially for complex patterns or challenging site conditions.
4. How long does metro tile installation take? Installation time varies by project complexity: basic running bond patterns take 3-4 hours per square meter, while herringbone patterns require 5-7 hours per square meter. A typical kitchen backsplash (6-8 sqm) takes 1-3 days including preparation and finishing.
5. What maintenance do metro tiles require? Metro tiles require minimal maintenance: daily wiping with damp cloth, weekly grout cleaning with mild solutions, and annual professional cleaning for heavily used areas. The glazed surface resists stains and moisture, making routine care straightforward.
6. Which grout color works best with white metro tiles? Light grey grout provides the classic look with white metro tiles, offering subtle definition without overwhelming the design. White grout creates seamless appearance, while darker grouts provide bold contrast that emphasizes individual tiles.
7. How do I choose between different metro tile patterns? Consider your kitchen style and personal preferences: running bond suits traditional spaces, herringbone adds sophisticated drama, and vertical stack creates contemporary appeal. Your kitchen size and layout also influence pattern selection.
8. Are metro tiles suitable for Manchester's older properties? Metro tiles work excellently in Manchester's heritage properties, bridging traditional character with modern functionality. Their clean lines complement period features while providing contemporary kitchen performance in Victorian and Edwardian homes.
9. How many extra tiles should I purchase? Purchase 10-15% extra tiles to account for cutting waste and future repairs. This is particularly important for specialty or discontinued patterns that may not be available later for matching repairs.
10. What tools do I need for DIY metro tile installation? Essential tools include tile cutter or wet saw, notched trowels, tile spacers, level, rubber grout float, and quality measuring tools. Investing in proper tools significantly improves results and installation efficiency.
Additional Resources
1. Tile Industry Resources:
British Ceramic Tile Association (BCTA) - Professional standards and technical guidance
Tile Association Technical Guides - Installation best practices and troubleshooting
2. Design Inspiration:
Kitchen Design Institute - Contemporary metro tile applications and trends
Period Property Magazine - Historical context and heritage property considerations
3. Professional Development:
Construction Skills Certification Scheme (CSCS) - Contractor qualification verification
Which? Trusted Traders - Vetted contractor directory and reviews
4. Maintenance and Care:
Ceramic Tile Education Foundation - Comprehensive care and maintenance guides
Professional Cleaning Association - Specialized cleaning techniques and product recommendations
5. Manchester-Specific Resources:
Manchester City Council Planning Guidelines - Historic property renovation requirements
Greater Manchester Combined Authority - Local building regulations and permits